Creating a 32/64bit Windows DLL with Dev-Cpp and using it from Java
This is something that I suddenly got curious about how is done and tried to do it myself. I messed around with this subject for few hours, tried some approaches that failed at the end and, after all that, I'll try to write down a quick and effective "recipe" for doing so.
First of all, to create a 64bit Windows library we must use a 64bit compiler. Lucky for us, there's a Dev-Cpp package that comes with a 64bit compiler (available here - choose the "The setup which includes TDM-GCC x64 4.8.1"). Paraphrasing the content in this link:
   Choosing between 32bit and 64bit
   The 64bit compiler will fully work op 32bit systems.
   The 64bit compiler can create 64bit and 32bit executables and DLLs.
   The 64bit compiler currently provides much more headers and libraries.
   The 32bit compiler can only create 32bit executables and DLLs.
 So, there's no much reason left to use a 32bit compiler anyway.
Okay, let's make our DLL!
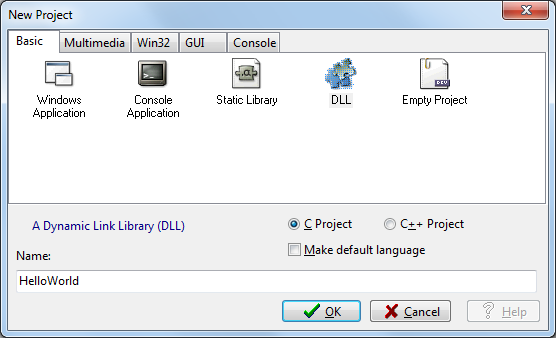
Go to Dev-Cpp and create a new DLL project (C language type), name it "HelloWorld" and save it somewhere in your harddrive. Dev-Cpp will automatically generate two files: a header file (.h) and a main source code file (.c/.cpp depending on which language you've choosen).
I'm not sure why Dev-Cpp generates some DLLIMPORT statements in the code since we're creating a DLL (therefore we would like to produce an API, for instance, not to consume one). Have in mind that DLLEXPORT is used to mark a function as exported from the DLL. DLLIMPORT is the opposite: it marks a function as being imported from a DLL. So let's rewrite our header file to the following:
/* dll.h */
#ifndef __DLL_H__
#define __DLL_H__

#define DLL_EXPORT __declspec(dllexport)

    char * DLL_EXPORT hello(char * user); // returns a string "Hello USER!";
    void DLL_EXPORT helloworld(); //prints out a "Hello World"

#endif // __DLL_H__
In our automatically-generated main source code, there's some trash code followed by a DllMain function. We'll not touch this function. To know more about it's importance and how to use it, check out this thread.
Fill out the source code with these lines:
/* dllmain.c */
#include "dll.h"
#include <windows.h>
char * DLL_EXPORT hello(char * user) // // returns a string "Hello USER!";
{
char * greeting = malloc( strlen(user) + 7); // + "Hello!" characters
sprintf(greeting, "Hello %s!", user);
return greeting;
}
void DLL_EXPORT helloworld()
{
printf("Hello World\n");
}
BOOL WINAPI DllMain(HINSTANCE hinstDLL,DWORD fdwReason,LPVOID lpvReserved)
{
switch(fdwReason)
{
case DLL_PROCESS_ATTACH:
{
break;
}
case DLL_PROCESS_DETACH:
{
break;
}
case DLL_THREAD_ATTACH:
{
break;
}
case DLL_THREAD_DETACH:
{
break;
}
}
/* Return TRUE on success, FALSE on failure */
return TRUE;
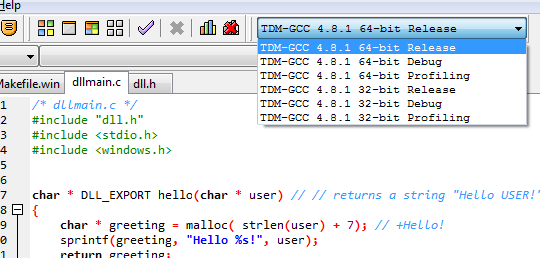
}Save all files, then go to "Execute -> Rebuild All". The IDE should have generated our DLL (HelloWorld.dll) in our project's directory path. To compile it on the 64bit compiler, make sure you've chosen right compiler version (TDM-GCC X 64-bit Release) in the dropdown list shown in the toolbar.
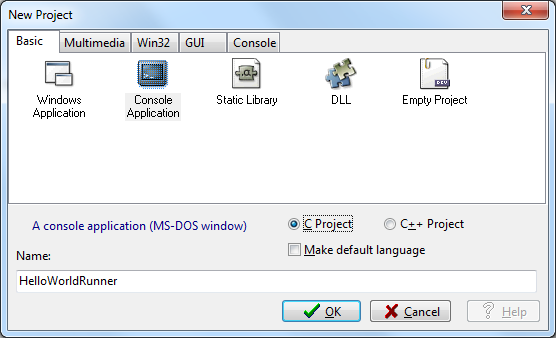
Now let's try to use it. Create a new "Console Application" Project, type C, name it "HelloWorldRunner" and save it into the same directory used for the DLL.
Dev-Cpp will automatically generate our main function, so let's add some more lines of code to it:
/* main.c */
#include <stdio.h>
#include <windows.h>
typedef char * (*HelloFunction)(char*);
typedef void (*HelloWorldFunction)();
int main(int argc, char *argv[])
{
HINSTANCE hinstDLL;
hinstDLL = LoadLibrary("HelloWorld.dll");
if(hinstDLL != 0)
{
HelloFunction hello;
HelloWorldFunction helloworld;
hello = (HelloFunction) GetProcAddress(hinstDLL, "hello");
helloworld = (HelloWorldFunction) GetProcAddress(hinstDLL, "helloworld");
printf("%s\n", hello("carr3r"));
helloworld();
FreeLibrary(hinstDLL);
}
else
printf("It was not possible to load DLL. Error #%d", GetLastError());
return 0;
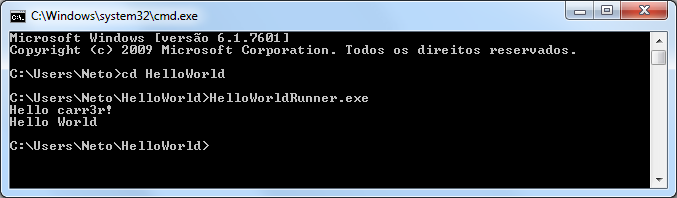
}Save it. Build it. Run it. Don't forget to build this new project with a 64bit compiler, otherwise you won't be able to load the DLL.
So far, so good. Now comes the "tricky" part: using our brand new DLL in Java. The approach I liked the most was to do it using the Java Native Access (JNA) library and a useful tool called JNAerator. Copied & pasted from Wikipedia: "JNAerator is a computer programming tool for the Java programming language which automatically generates the Java Native Access (JNA) or BridJ code needed to call C and Objective-C libraries from Java code.". Use can get the JNA library here and the JNAerator here.
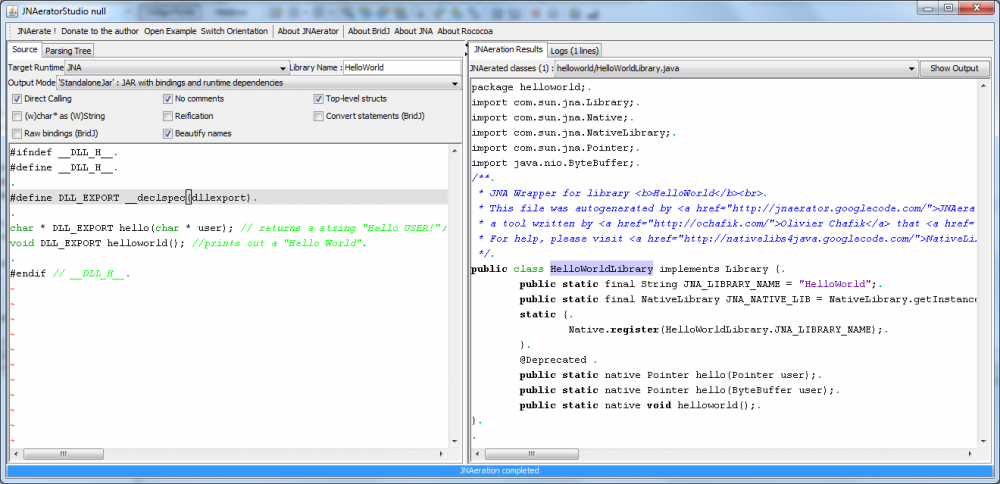 On Eclipse or Netbeans, create a new standard Java project. First, add the JNA jar file into to the project's compile-time library list so you'll be able to use it whitin your code. Second, add a new class file, named "HelloWorldLibrary" into the project files. The content of this file will be automatically generated by the JNAerator, that will interpret the C header file of our DLL and create a corelated class for Java (using JNA's classes). Launch the JNAerator (java -jar JNAerator.jar). Copy and paste our DLL header file content into the source textarea, select "JNA" in the "Target Runtime" dropdown listbox, set "HelloWorld" as the "Library Name" and click on the button "Ready to JNAerate". The tool should generate the code below:
/* HelloWorldLibrary.java */
import com.sun.jna.Library;
import com.sun.jna.Native;
import com.sun.jna.NativeLibrary;
import com.sun.jna.Pointer;
import java.nio.ByteBuffer;
/**
 * JNA Wrapper for library <b>HelloWorld</b><br>
 * This file was autogenerated by <a href="http://jnaerator.googlecode.com/">JNAerator</a>,<br>
 * a tool written by <a href="http://ochafik.com/">Olivier Chafik</a> that <a href="http://code.google.com/p/jnaerator/wiki/CreditsAndLicense">uses a few opensource projects.</a>.<br>
 * For help, please visit <a href="http://nativelibs4java.googlecode.com/">NativeLibs4Java</a> , <a href="http://rococoa.dev.java.net/">Rococoa</a>, or <a href="http://jna.dev.java.net/">JNA</a>.
 */
public class HelloWorldLibrary implements Library {
   public static final String JNA_LIBRARY_NAME = "HelloWorld";
   public static final NativeLibrary JNA_NATIVE_LIB = NativeLibrary.getInstance(HelloWorldLibrary.JNA_LIBRARY_NAME);
   static {
      Native.register(HelloWorldLibrary.JNA_LIBRARY_NAME);
   }
   @Deprecated
   public static native Pointer hello(Pointer user);
   public static native Pointer hello(ByteBuffer user);
   public static native void helloworld();
}
Now copy the generated code and save it into the "HelloWorldLibrary.java" file. Don't forget to place the "HelloWorld.dll" file into your Java project's directory path. To call the library from within your main function, simply use the instructions below:
   ByteBuffer name = ByteBuffer.wrap(("carr3r").getBytes("ASCII"));
   System.out.println( HelloWorldLibrary.hello(name).getString(0) );
   HelloWorldLibrary.helloworld();
All source codes are available here: